


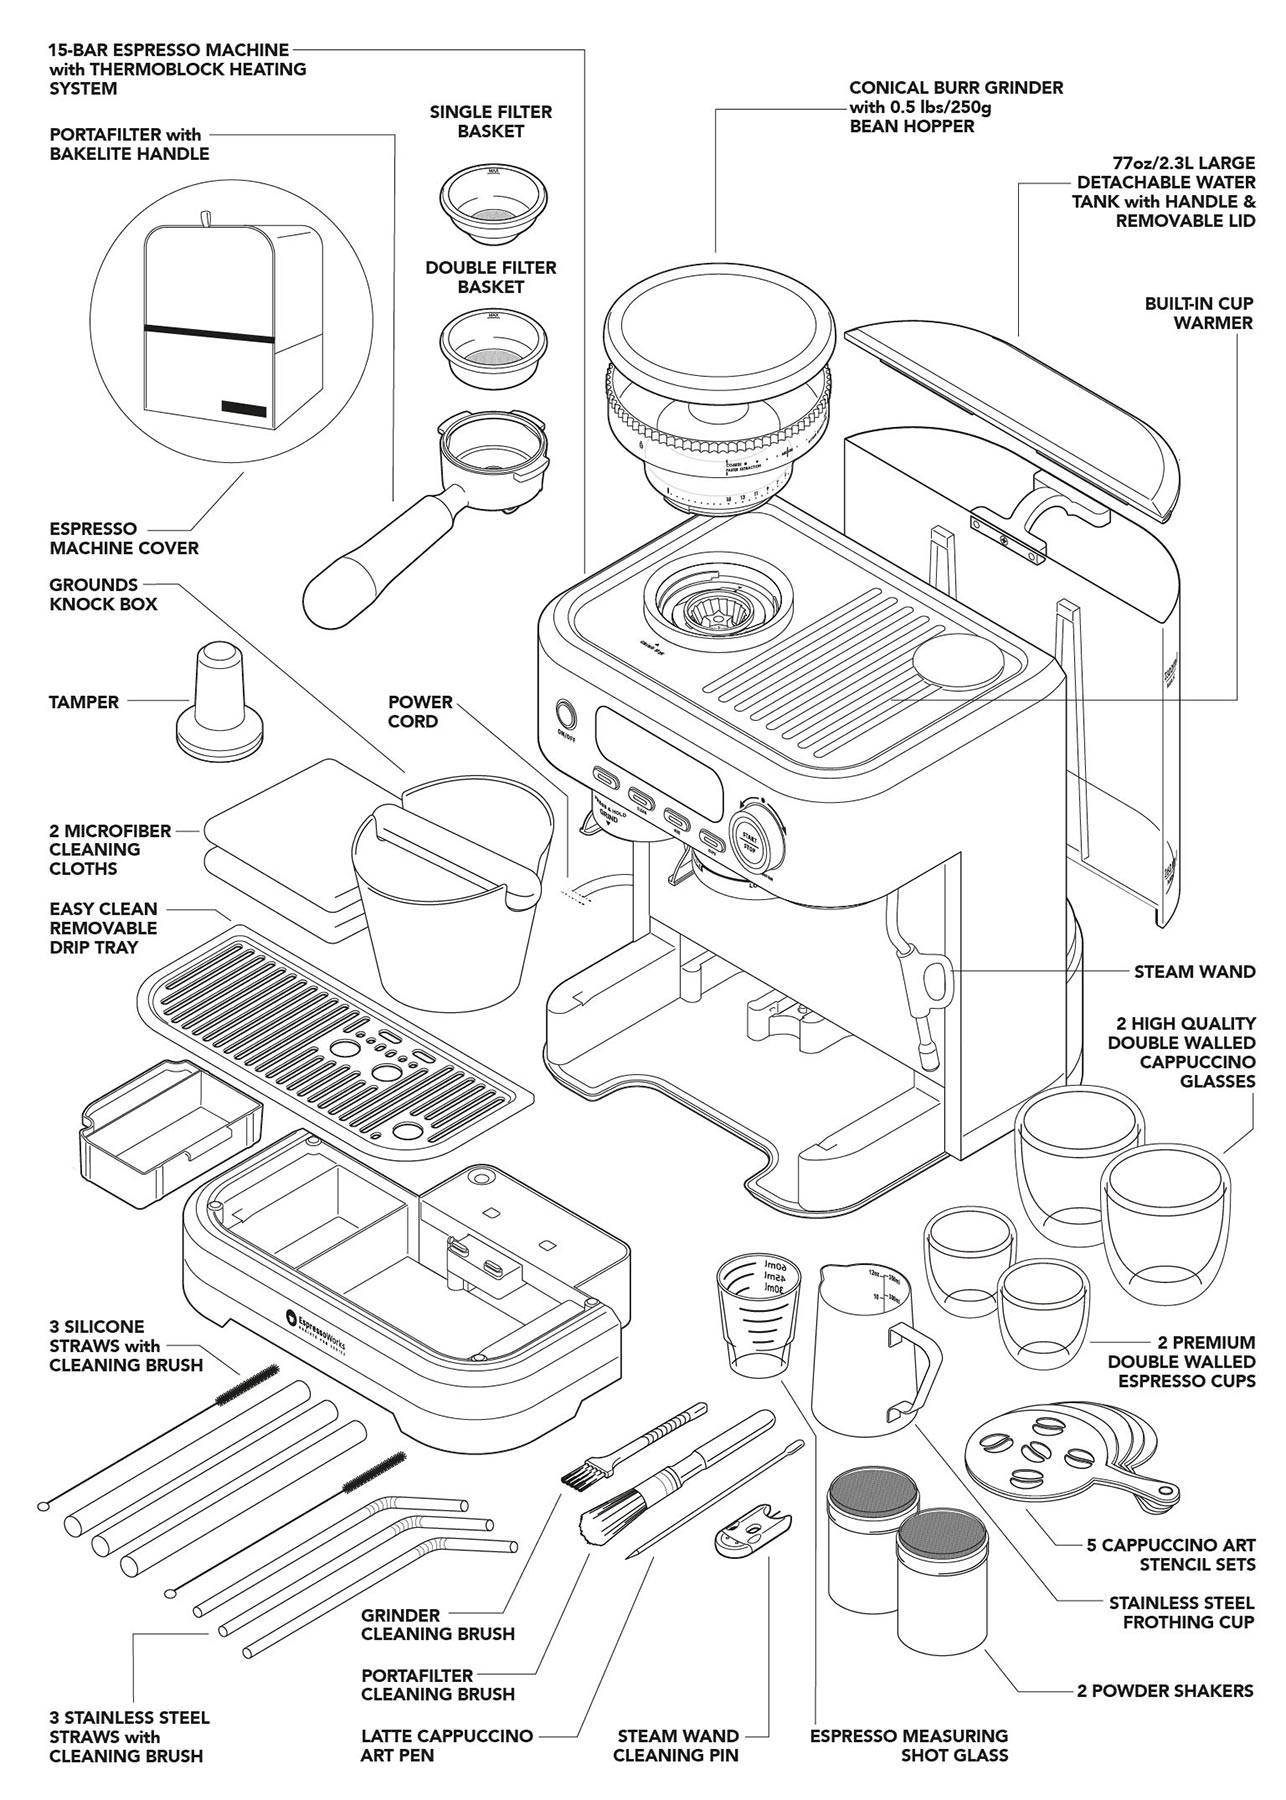

Step 1
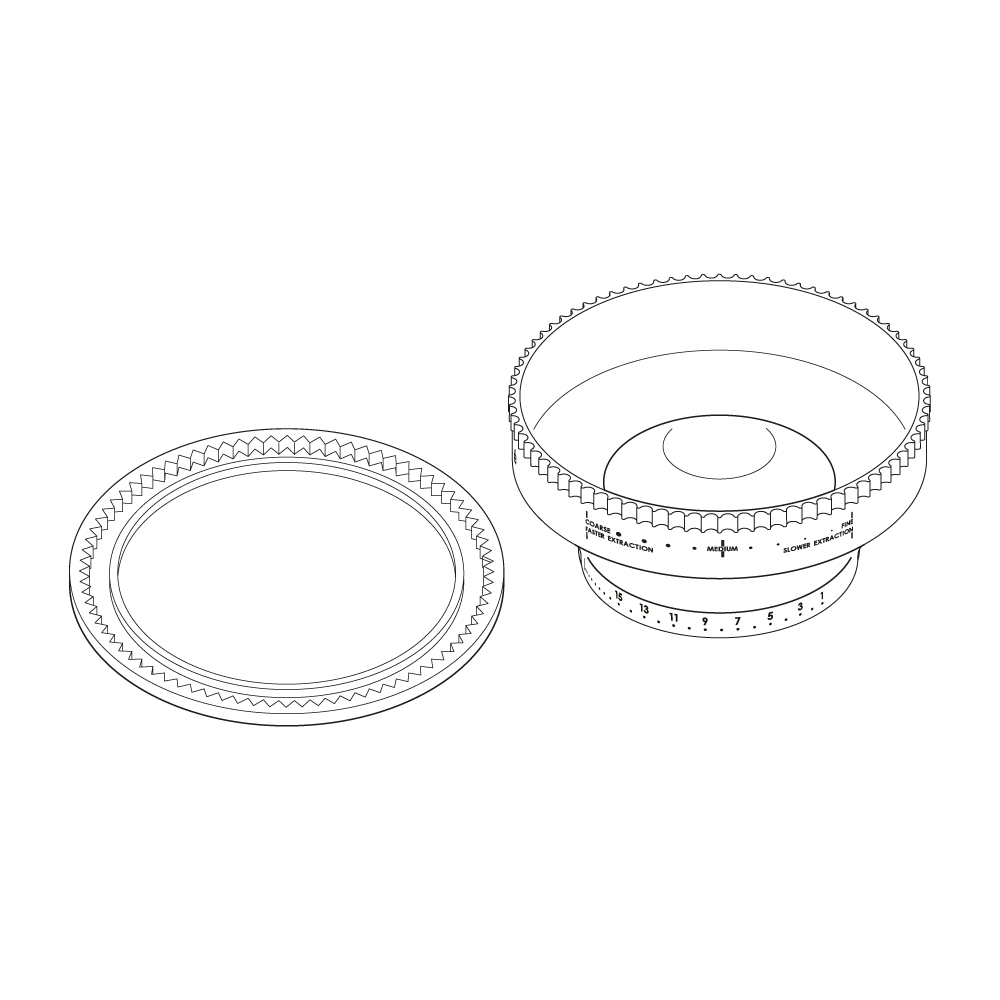
The line markings on the two rings at the bottom of the bean hopper must be aligned with each other.
Step 2
Place the bean hopper on the grinder so that the 'OPEN LOCK' symbol and the line markings are positioned above the ▲GRIND SIZE marking on the machine.
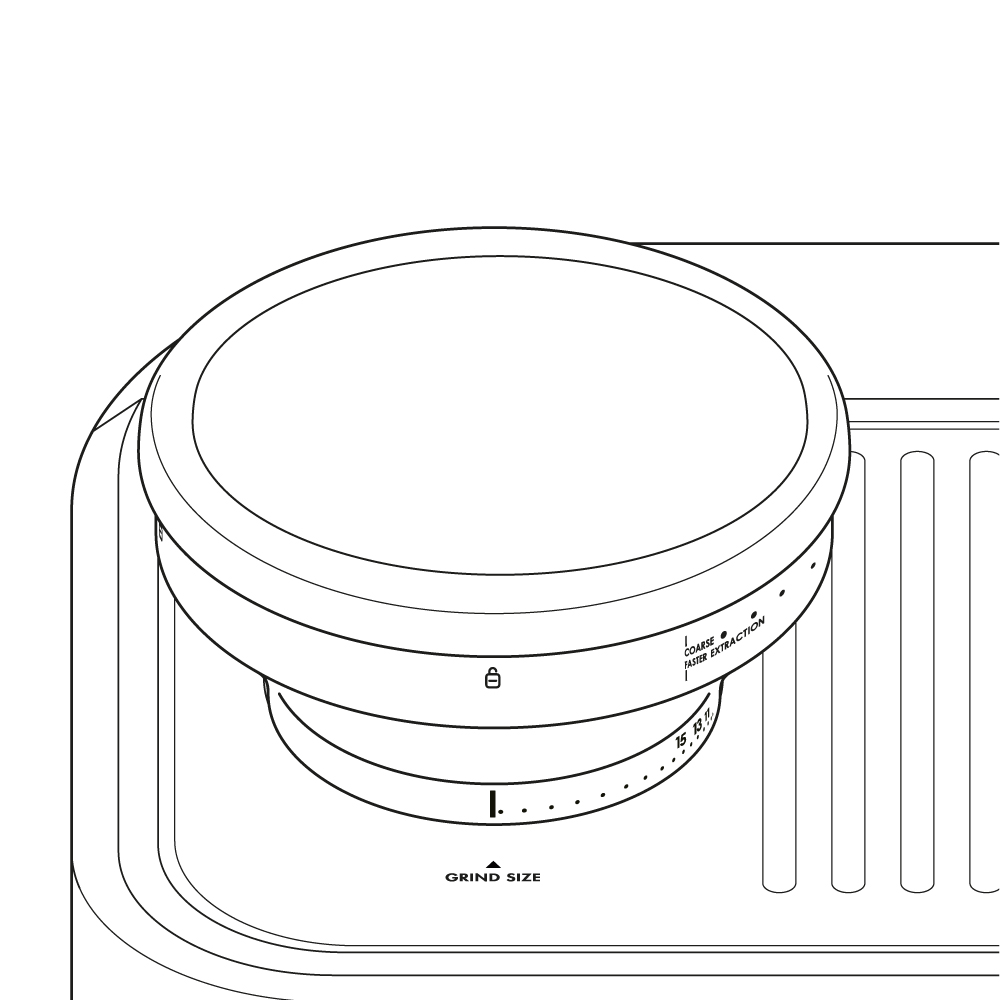
Step 3
Turn the bean hopper clockwise beyond the small notch until the ▲GRIND SIZE marking is aligned within the 1-15 number range.
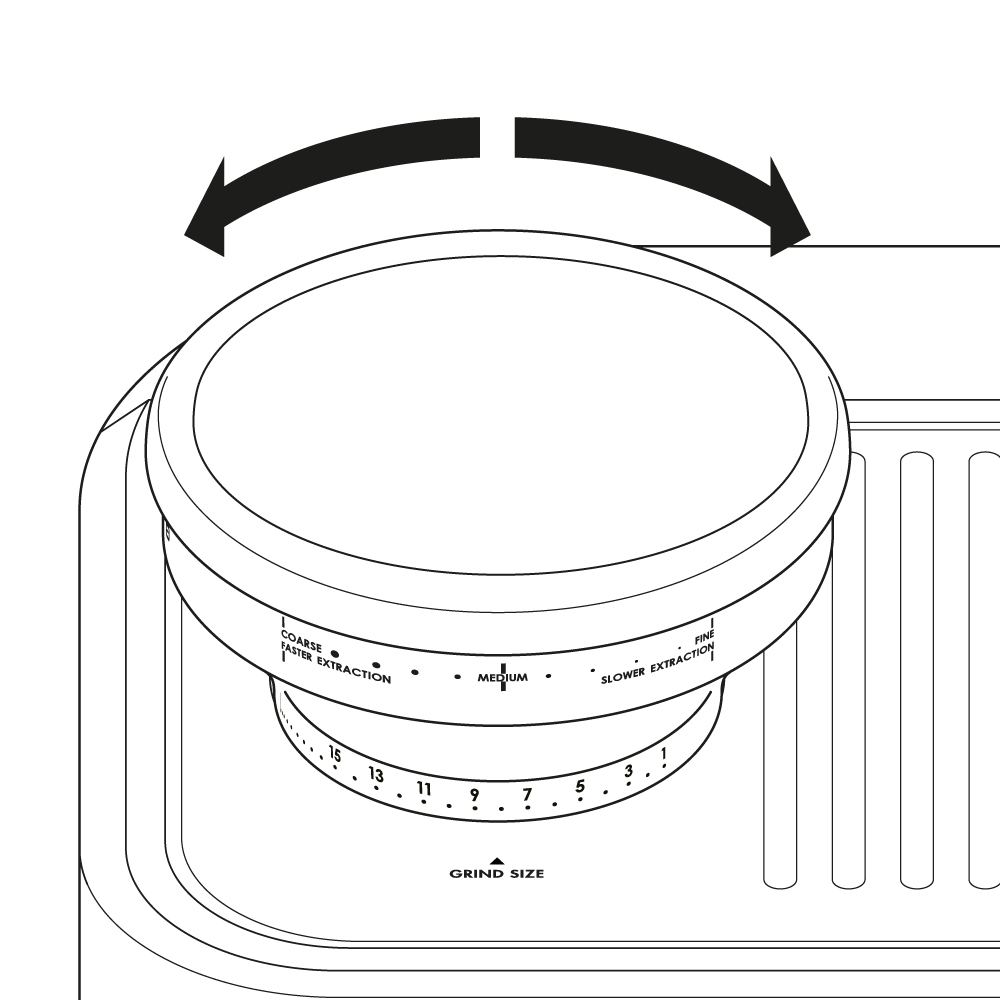
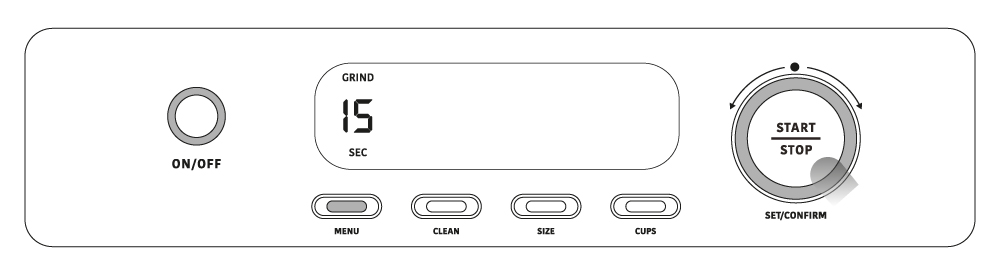
STEP 1 - SETTING THE DEGREE OF GRINDING
Rotate the bean hopper on the grinder clockwise until the ▲GRIND SIZE marking points to the desired degree of grinding on the bean hopper.
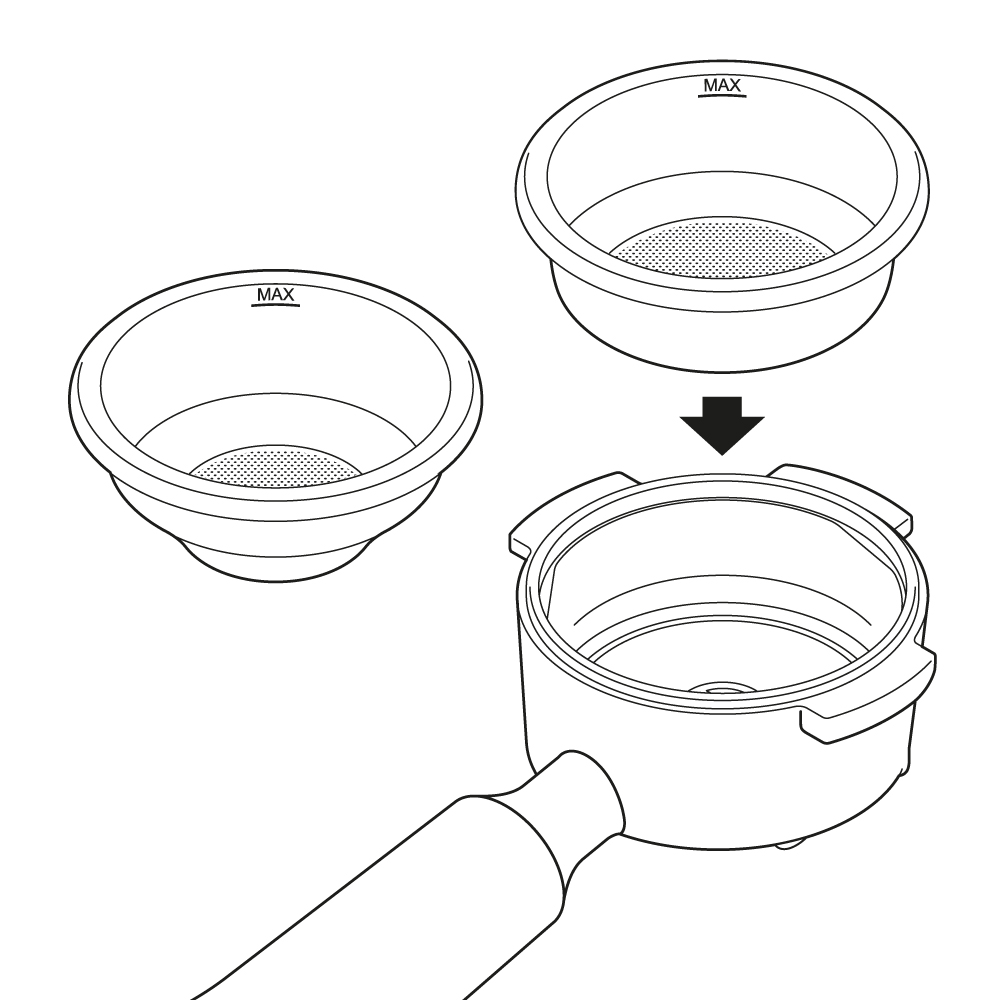
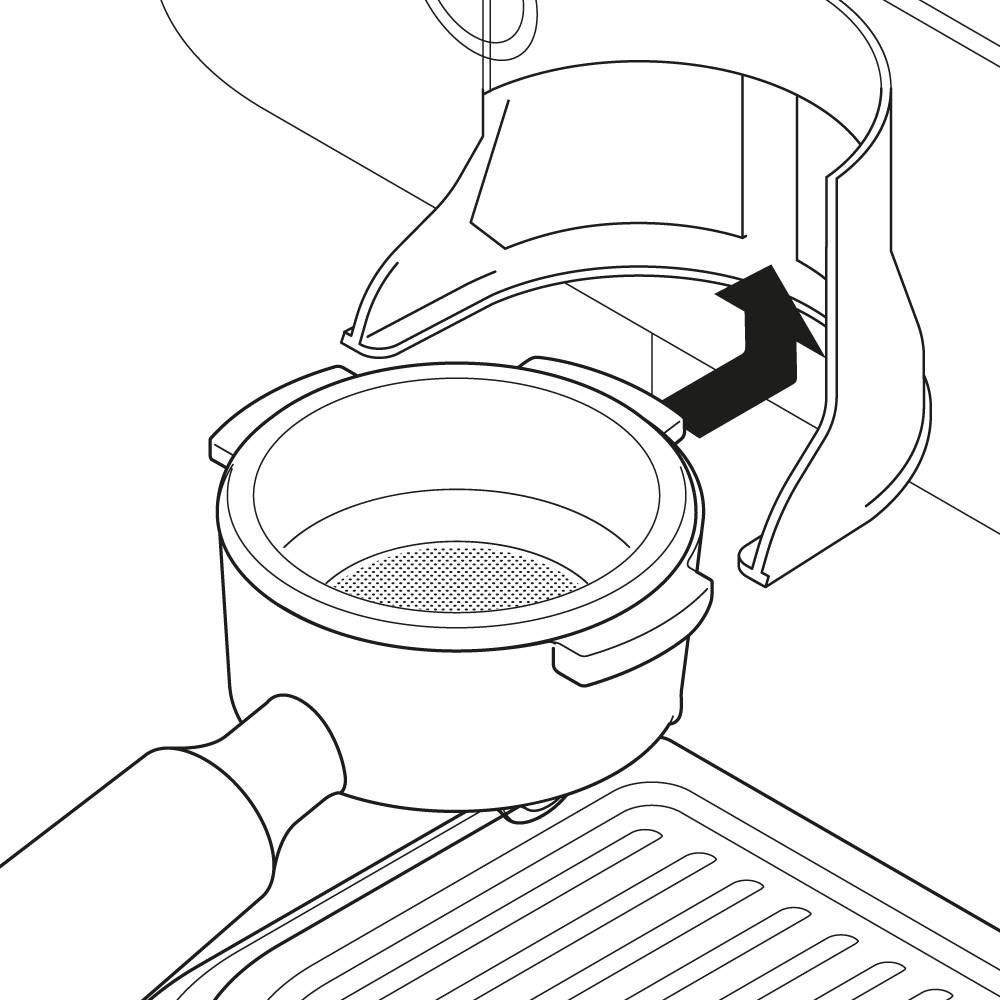
STEP 2 - PLACING THE PORTAFILTER
Insert the filter into the portafilter. To change filters, using the filter on hand, place the edge of filter on the gap between sieve holder and filter. Lever the filter into the sieve holder and take out it, as shown above.
STEP 2 - PLACING THE PORTAFILTER
Insert the filter into the portafilter. To change filters, using the filter on hand, place the edge of filter on the gap between sieve holder and filter. Lever the filter into the sieve holder and take out it, as shown above.

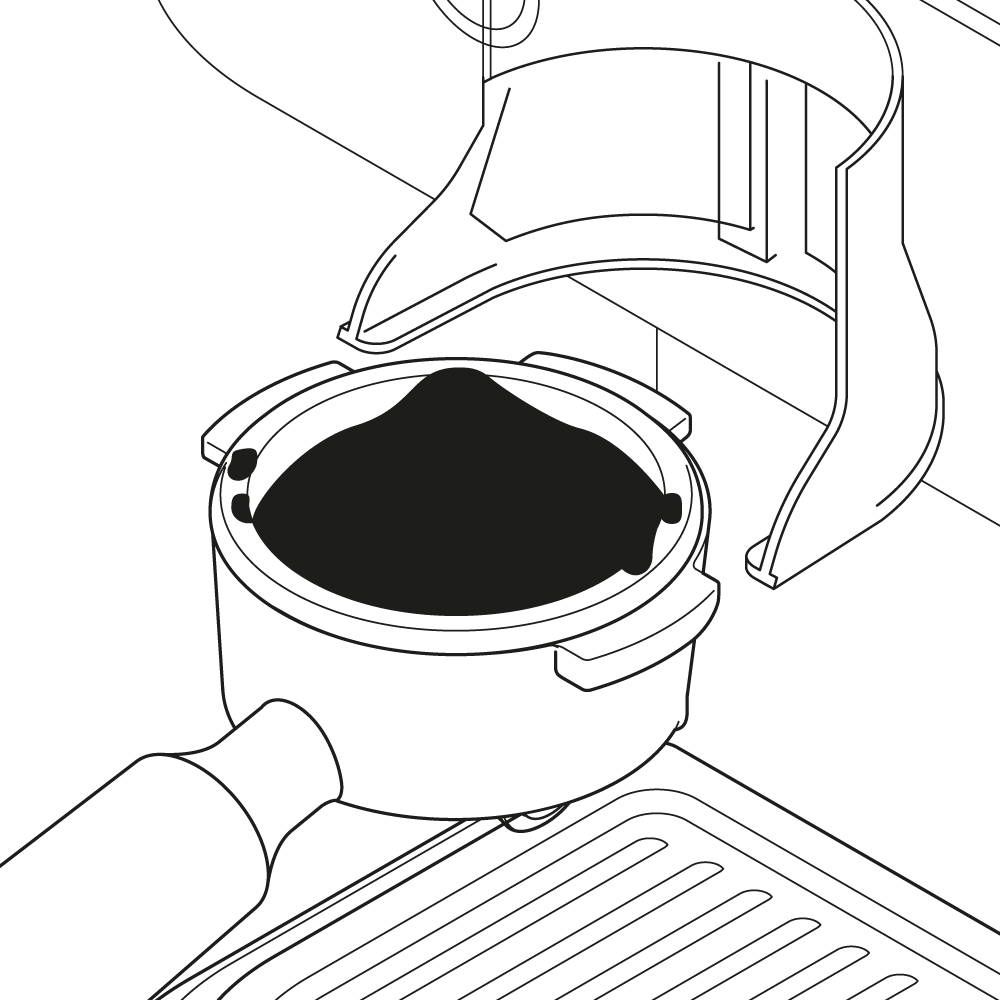
STEP 3 - GRINDING COFFEE
Slide the portafilter with filter into the holder under the grinder chute. You may choose to set the grinding time or simply tilt the handle of the portafilter downwards to press the edge of the filter against the "grinder button" from below. The grinder continues to function as long as the grinder button is held down.
STEP 4 - FINISHING THE GRIND
Release the "grinder button" as soon as the filter is filled slightly full of coffee powder. Wait until no more coffee powder is flowing and then carefully pull the portafilter out of the holder.
STEP 4 - FINISHING THE GRIND
Release the "grinder button" as soon as the filter is filled slightly full of coffee powder. Wait until no more coffee powder is flowing and then carefully pull the portafilter out of the holder.
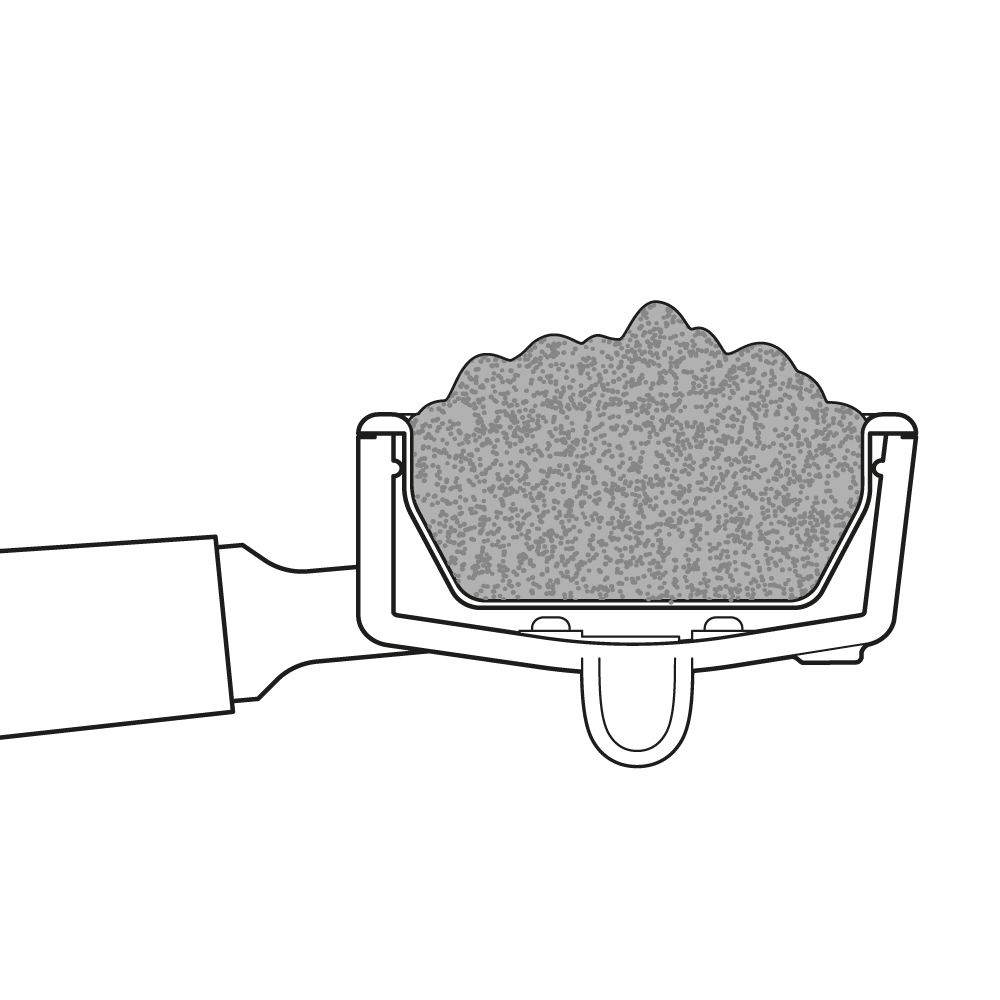
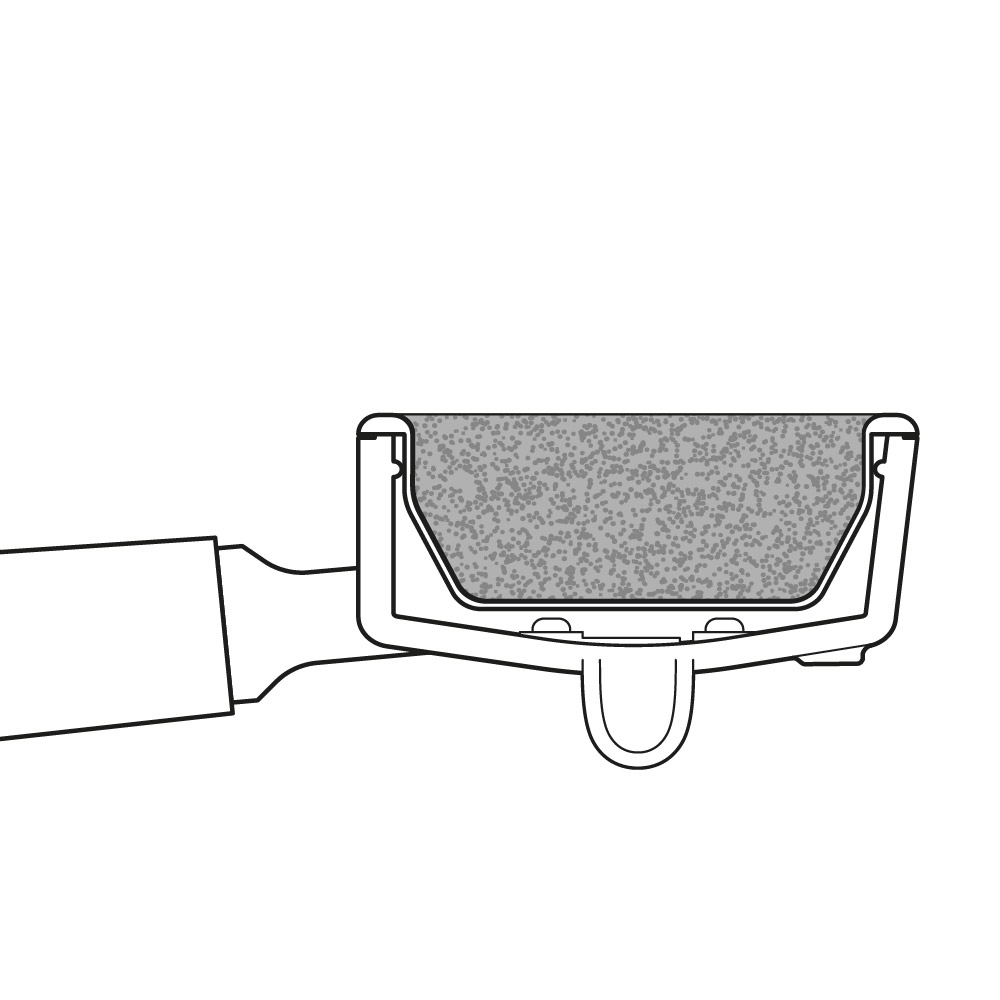
STEP 1 - EVENLY DISTRIBUTE COFFEE POWDER
Distribute the coffee powder evenly on the filter. To do this, you can easily tap the portafilter onto the work surface and spread it out without pressure, for example with a teaspoon.
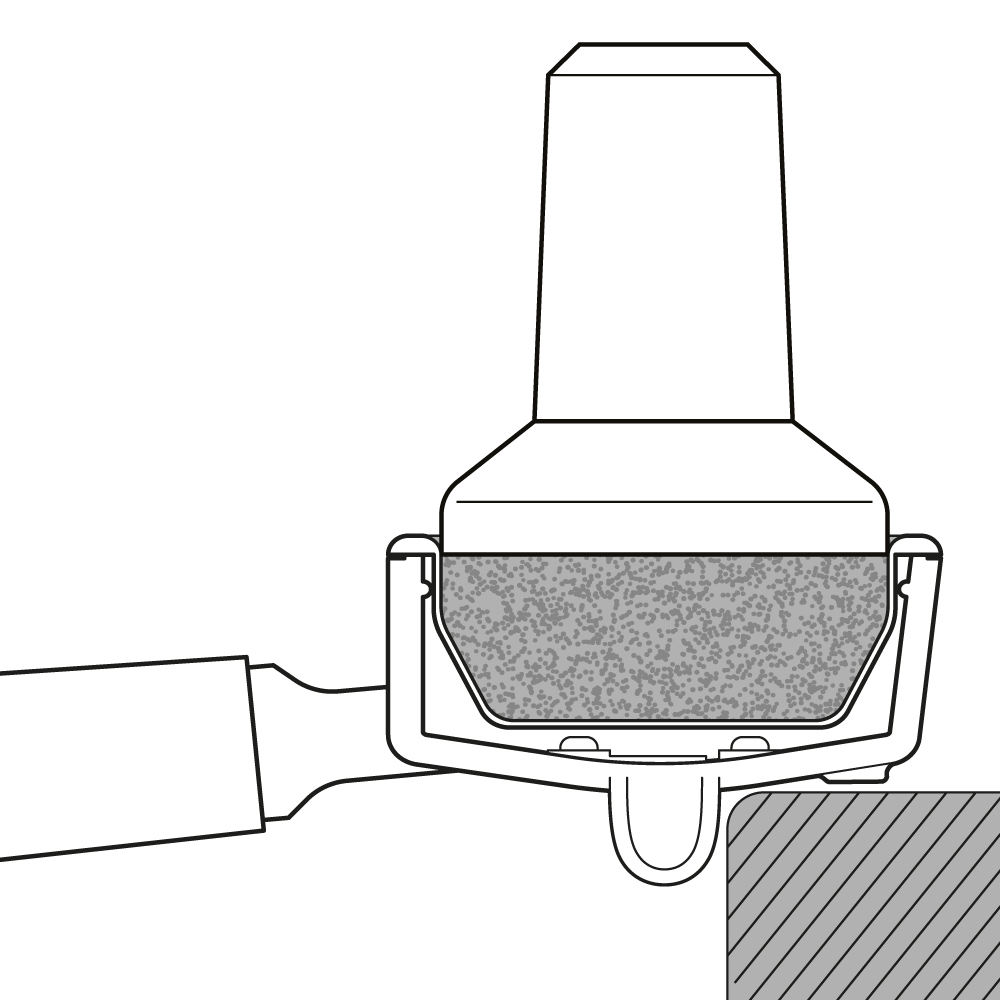
STEP 2 - TAMP DOWN ON THE PORTAFILER
Place the portafilter on the edge of a worktop (see figure). Place the tamper straight on the coffee powder from above and press it down evenly.
STEP 3 - CLEAR THE RIM OF ANY LOOSE POWDER
Carefully lift off the tamper. Wipe off any loose ground coffee powder from the edge of the filter.
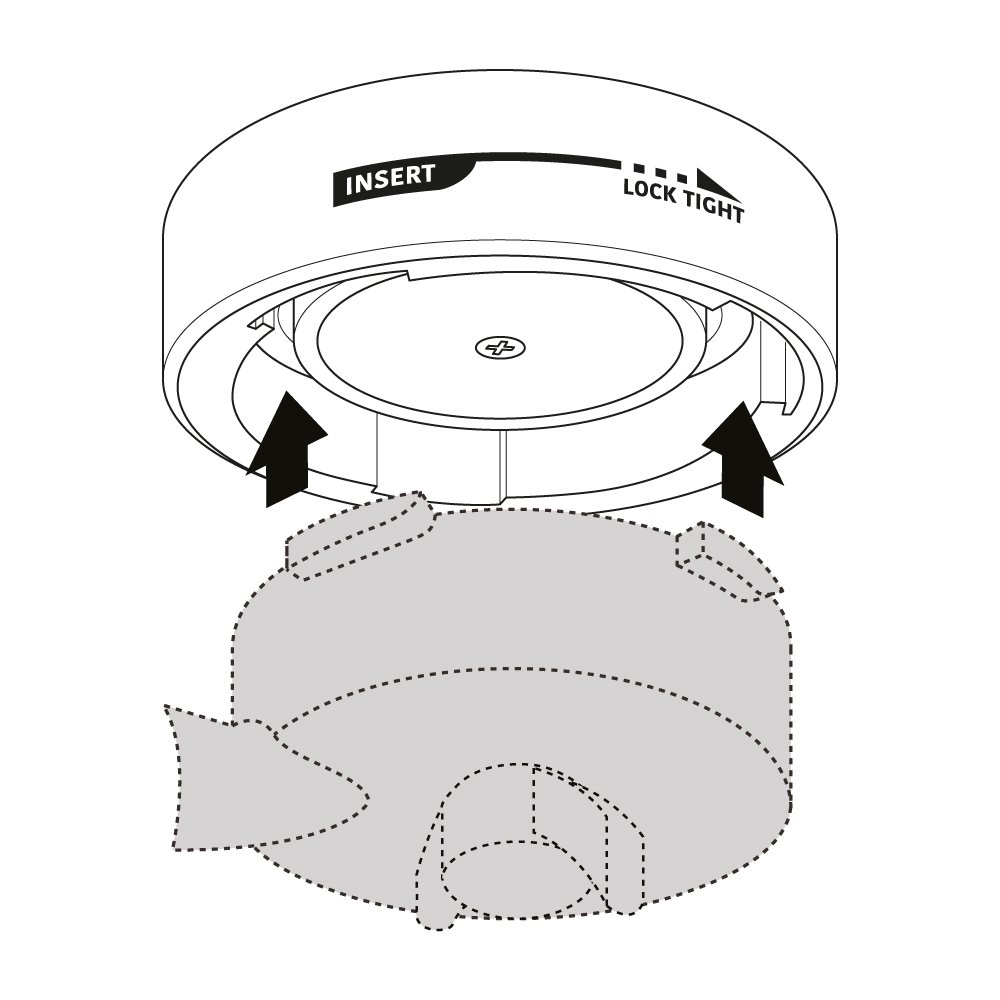
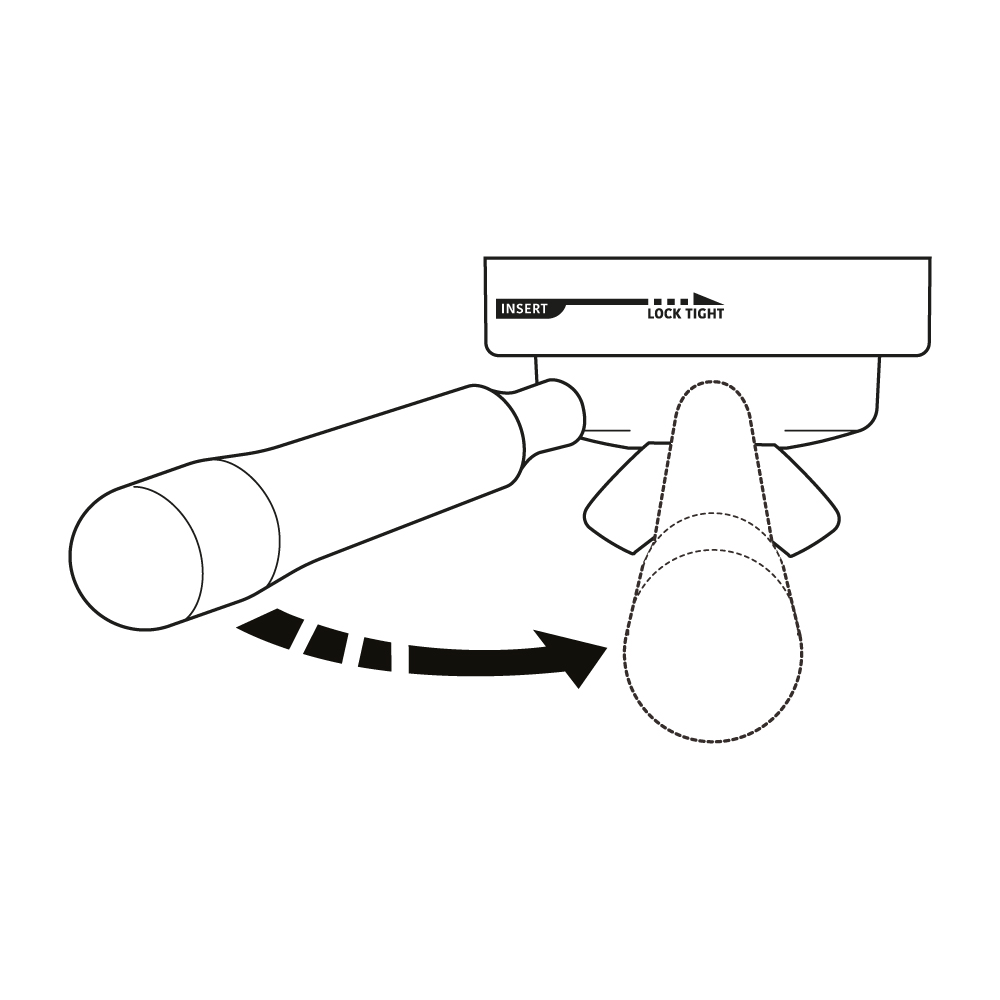
Align the portafilter lugs into the brew head slots and insert. Carefully twist the portafilter counter-clockwise until the handle aligns with the LOCK TIGHT marking on the brew head.
Align the portafilter lugs into the brew head slots and insert. Carefully twist the portafilter counter-clockwise until the handle aligns with the LOCK TIGHT marking on the brew head.

STEP 1
If desired, pre-heat the cups by placing them on the cup warmer for about 5-10 minutes.
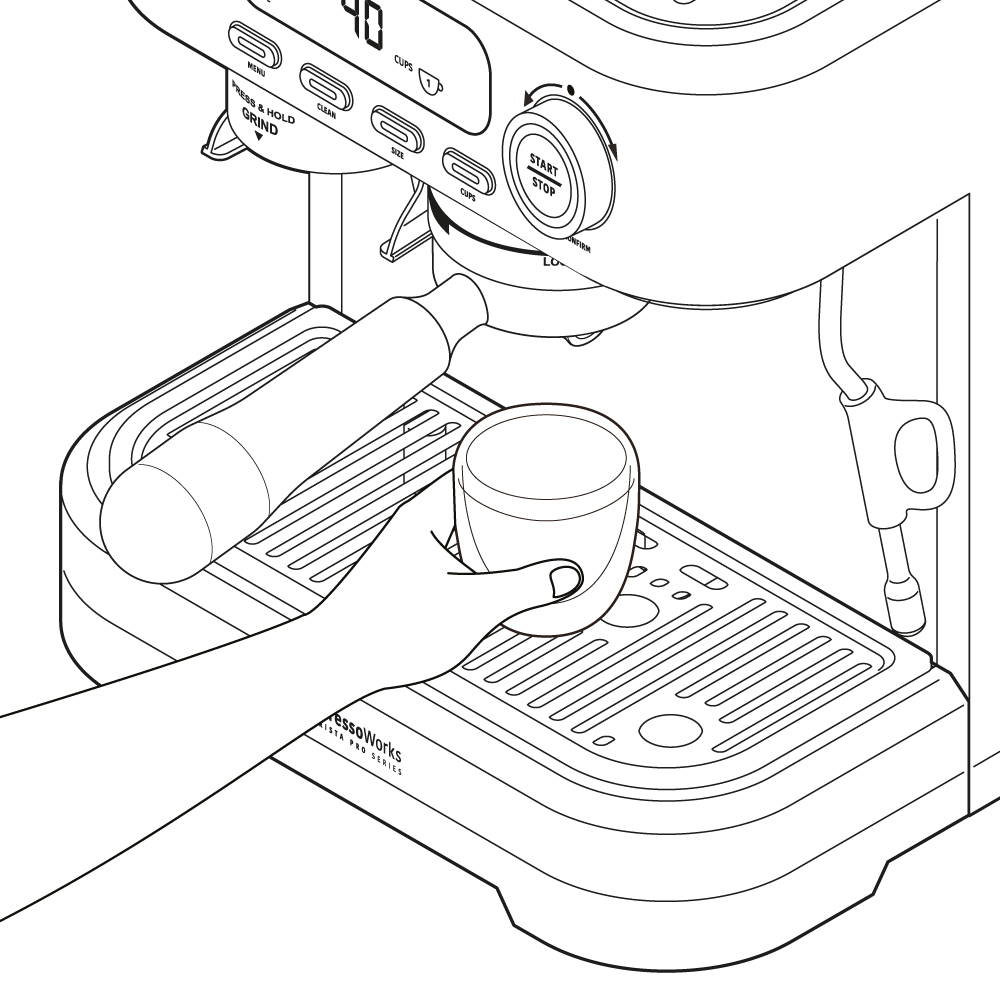
STEP 2
Place the cup under the brew head.
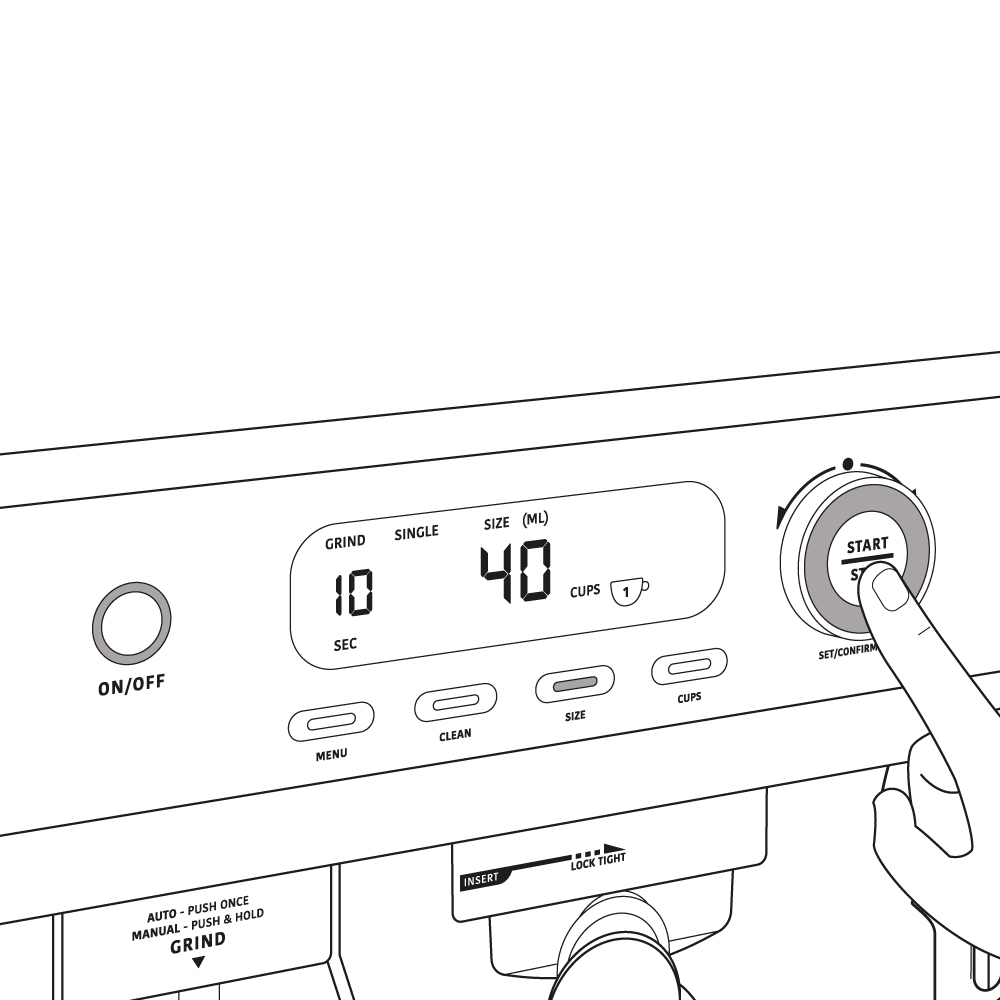
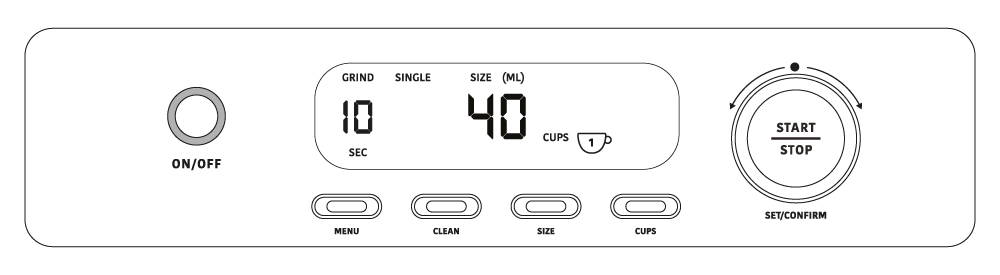
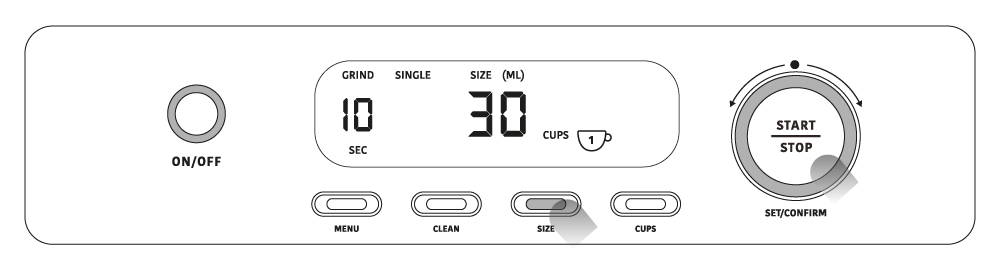
STEP 3a - SINGLE ESPRESSO
The machine is preset to 1 CUP once you turn it on.
Press the SIZE button and turn the DIAL to adjust the volume to “30~50ml”.
Press the START/STOP button to initiate the coffee brewing process (preset to 40ml).
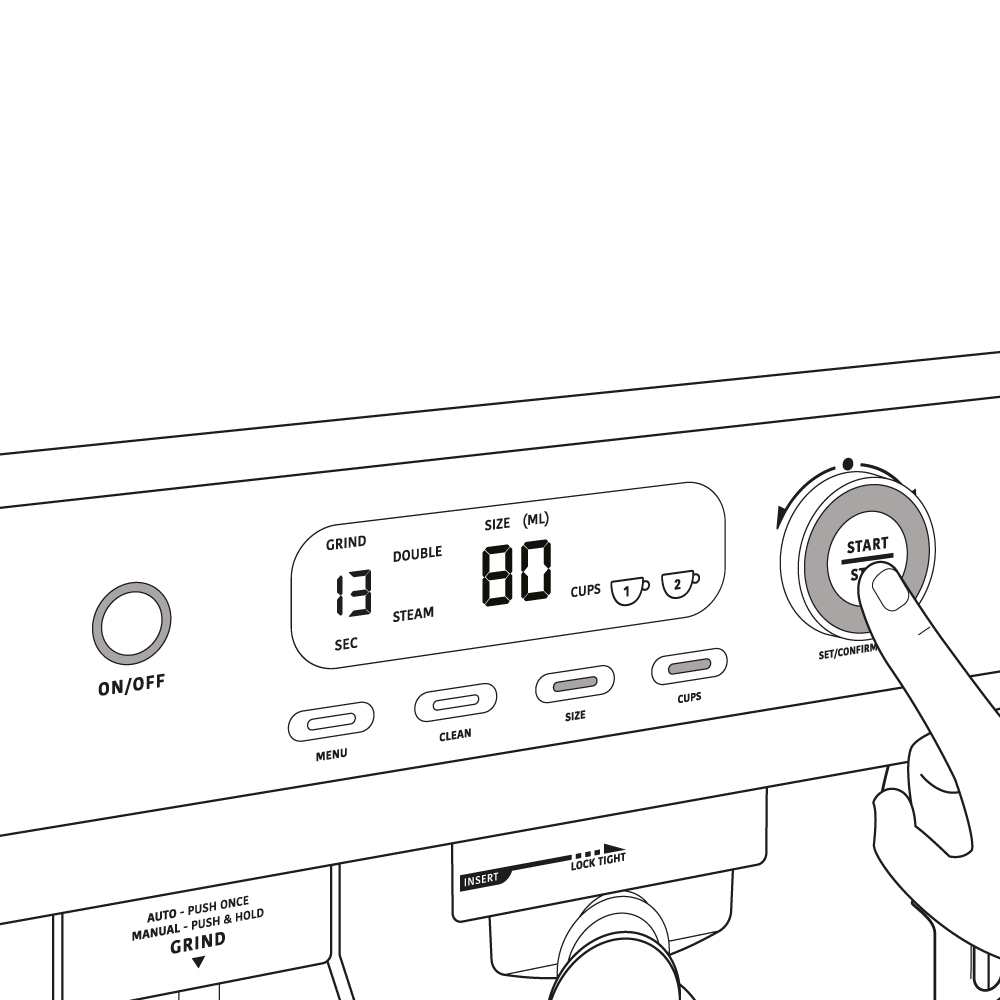
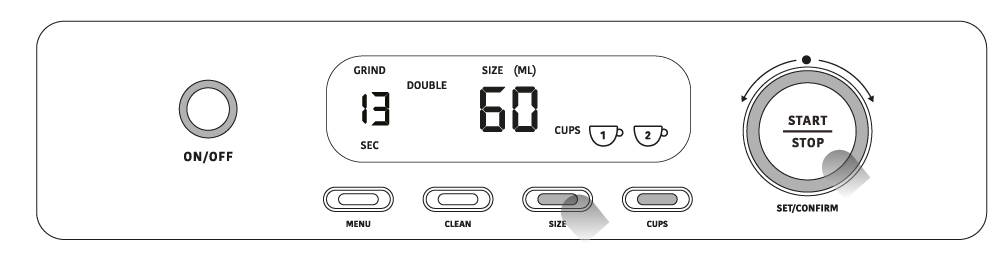
STEP 3b - DOUBLE ESPRESSO
Press the CUPS button once.
Press the SIZE button and turn the DIAL to adjust the volume to “60~90ml”
Press the START/STOP button to initiate the coffee brewing process (preset to 80ml).
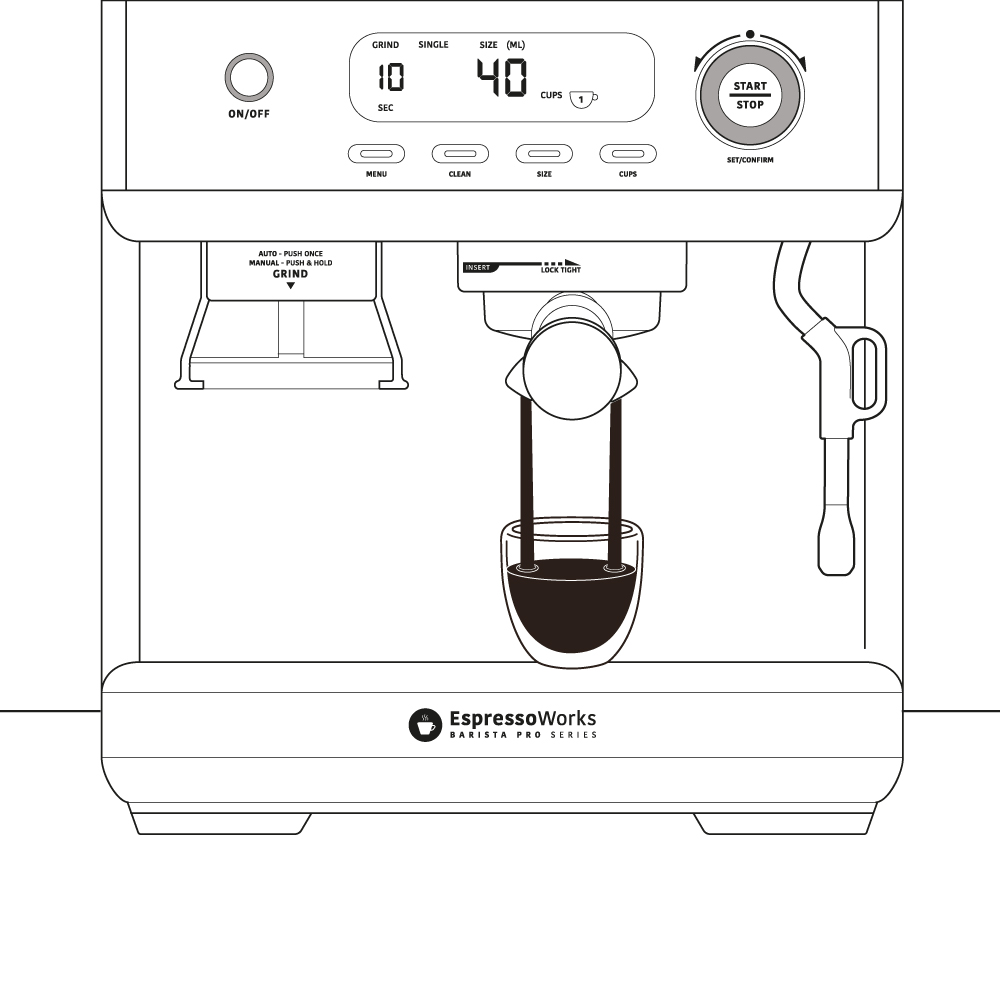
STEP 4
The START/STOP button will show a solid "BLUE" indicator light during the duration of the process.

STEP 5
When the brewing process is done, the "BLUE" indicator light will turn off.
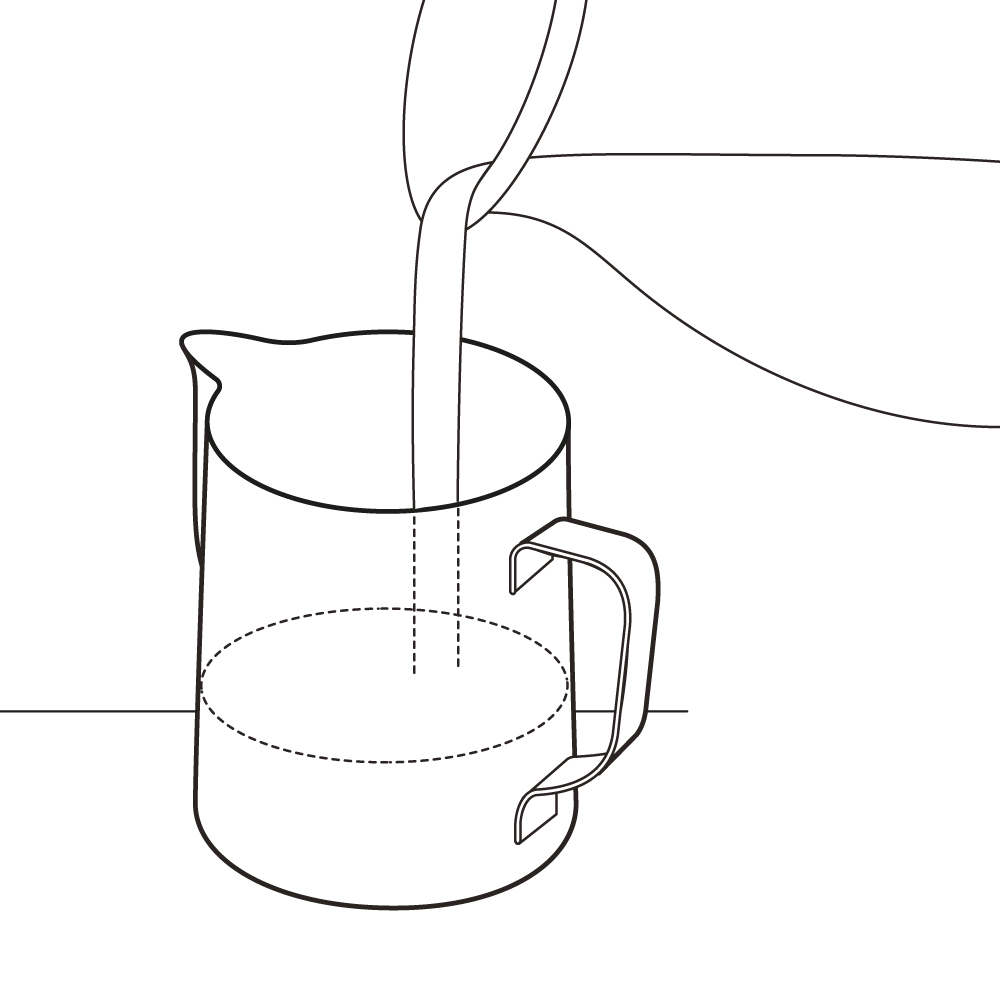
STEP 1
Fill the stainless steel frothing pitcher 1/3 of the way with fresh, cold milk. Please use skimmed milk for best results.
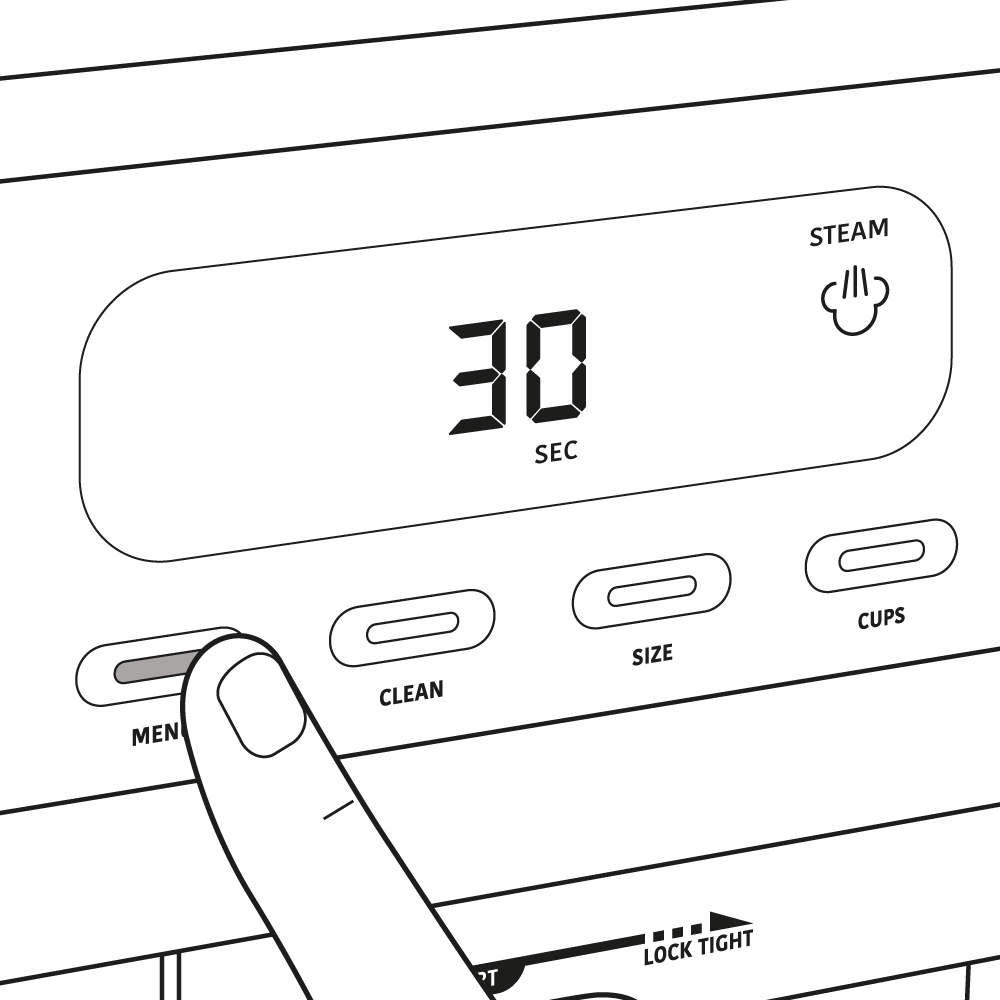
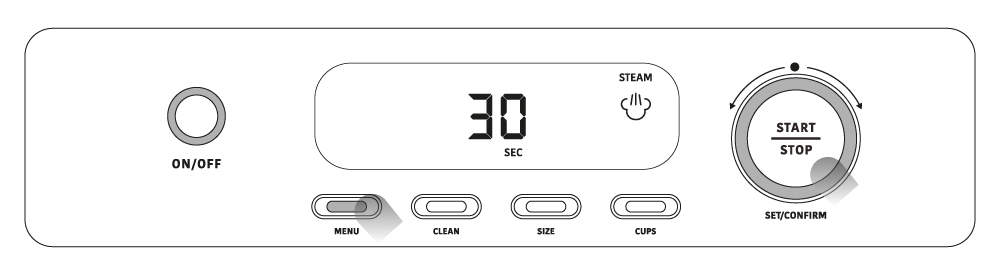
STEP 2
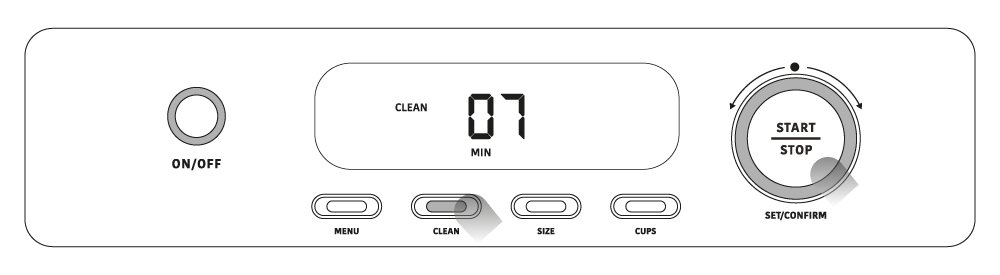
Press the MENU button to set the program to STEAM, and wait until the STEAM icon stops flashing. You can set the time using the DIAL.
STEP 2
Press the MENU button to set the program to STEAM, and wait until the STEAM icon stops flashing. You can set the time using the DIAL.

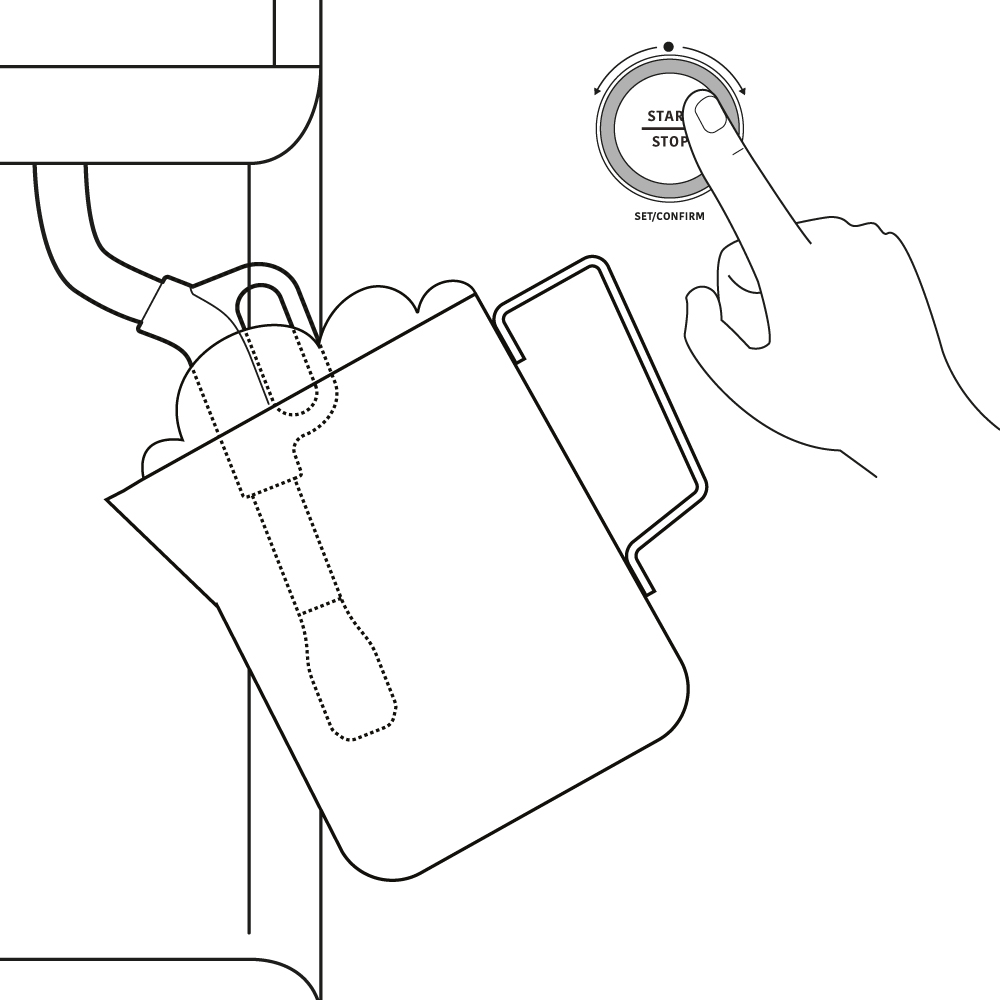
STEP 3
Move the steam wand away from the drip tray and hold the frothing pitcher at an angle so that the top of the steam wand sits just below the surface of the milk. Once you're ready, press the START/STOP button to start steaming. A countdown on the LCD screen will initiate once the process starts.
STEP 4
When the foam starts to increase in volume, immerse the steam wand deeper into the frothing cup. When the foam is at the desired level, push the START/STOP button to stop the process. Once steaming has completed, the "BLUE" indicator light on the START/STOP button will turn off and the countdown on the LCD screen will reset.
NOTE
STEP 4
When the foam starts to increase in volume, immerse the steam wand deeper into the frothing cup. When the foam is at the desired level, push the START/STOP button to stop the process. Once steaming has completed, the "blue" indicator light on the START/STOP button will turn off and the countdown on the LCD screen will reset.
NOTE
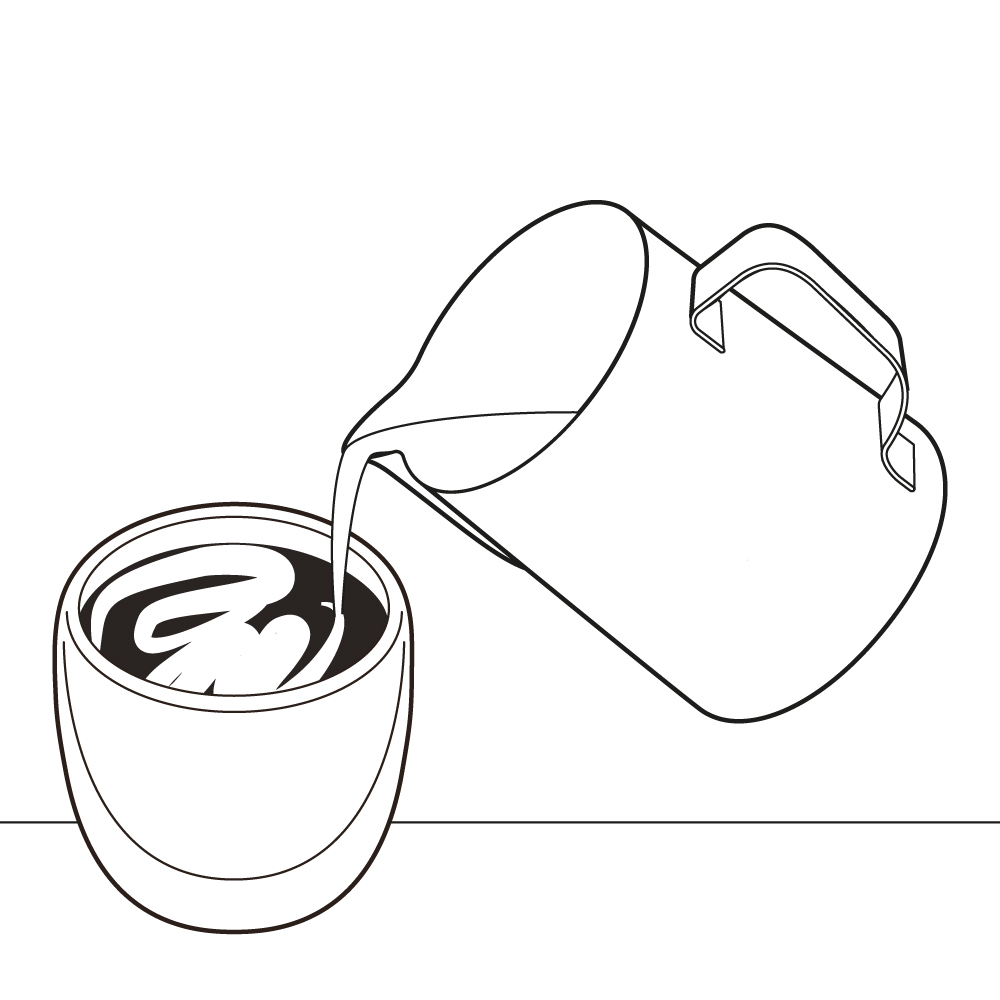
STEP 5
Pour the steamed froth. Enjoy!
1 CUP - SINGLE ESPRESSO
NOTE:
2 CUPS - DOUBLE ESPRESSO
NOTE:

2 CUPS - DOUBLE ESPRESSO
NOTE:
NOTE:
NOTE:
NOTE:
NOTE:
IMPORTANT

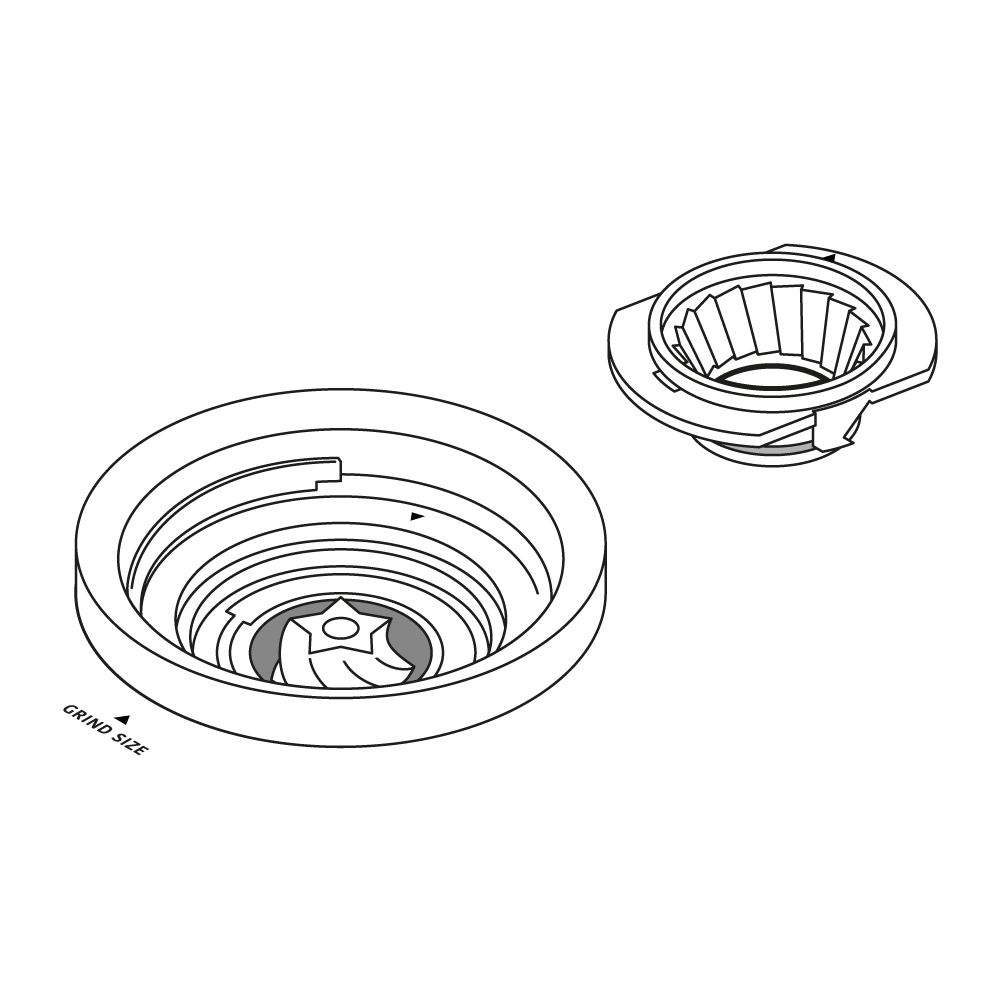
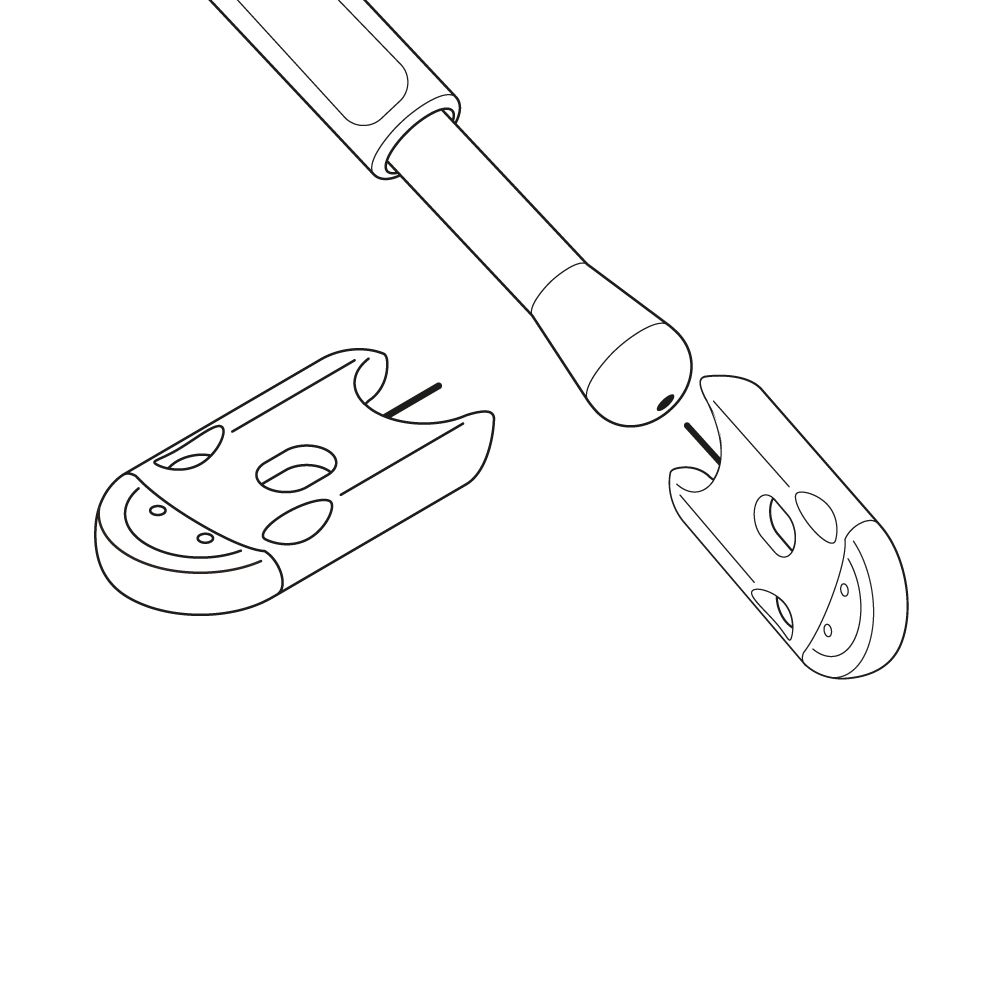
STEP 1
Unlock the burr grinder by rotating it clockwise. Carefully remove the top burr.
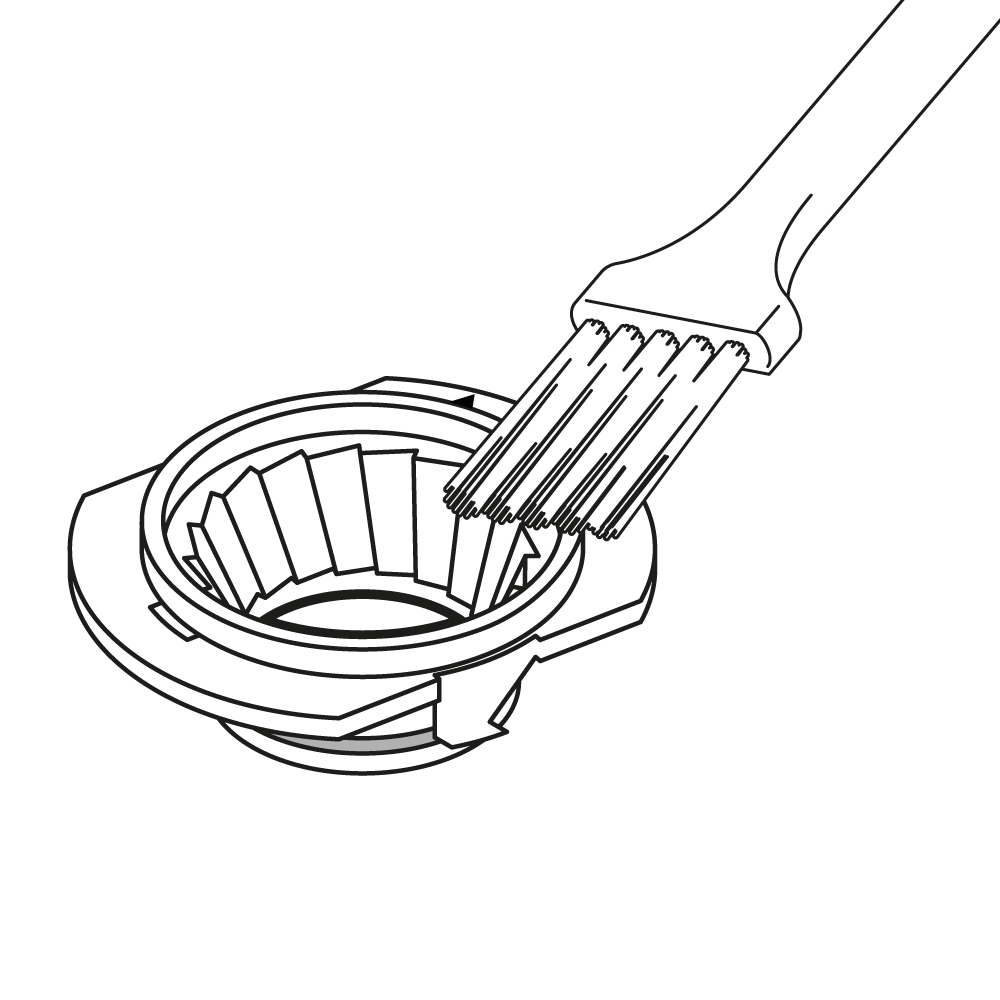
STEP 2
Remove any debris and clean the top burr with the grinder brush.
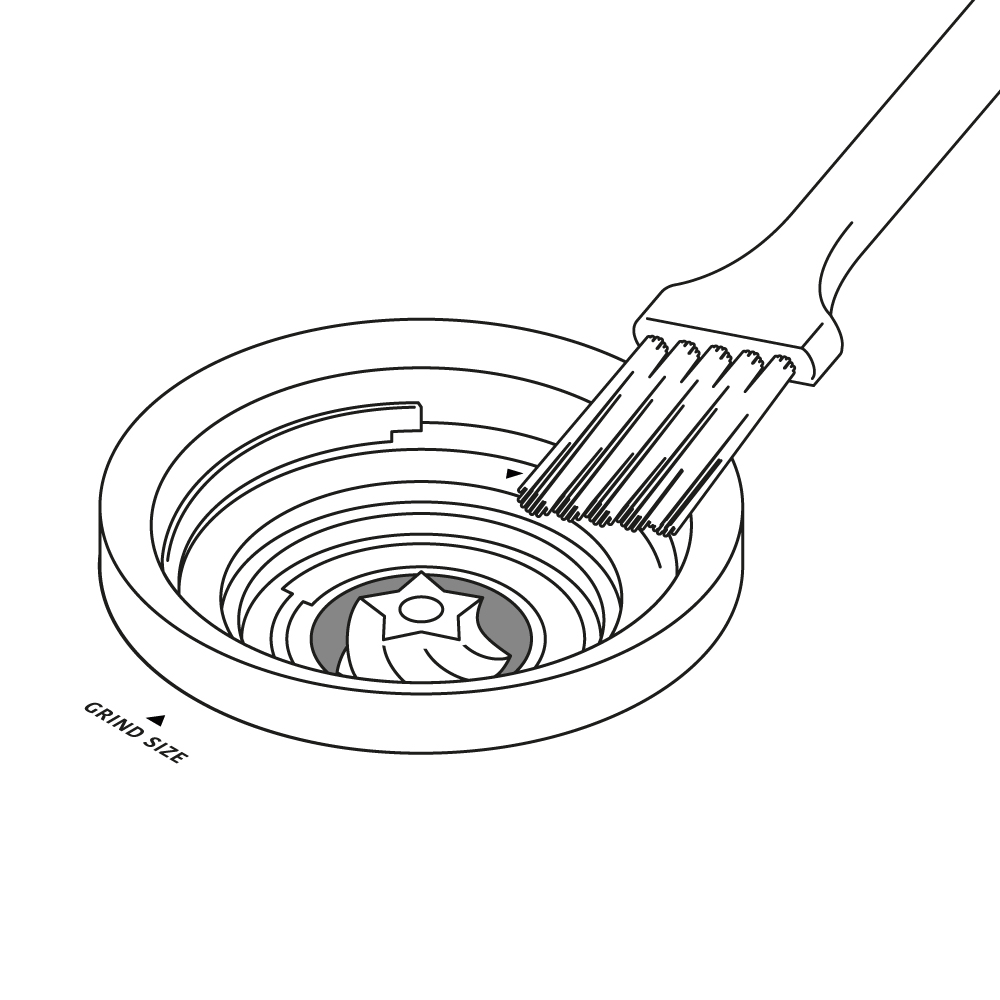
STEP 3
Remove any debris and clean the lower burr with the grinder brush. You may use a stick to pry out any stuck debris in between the grinder blades.
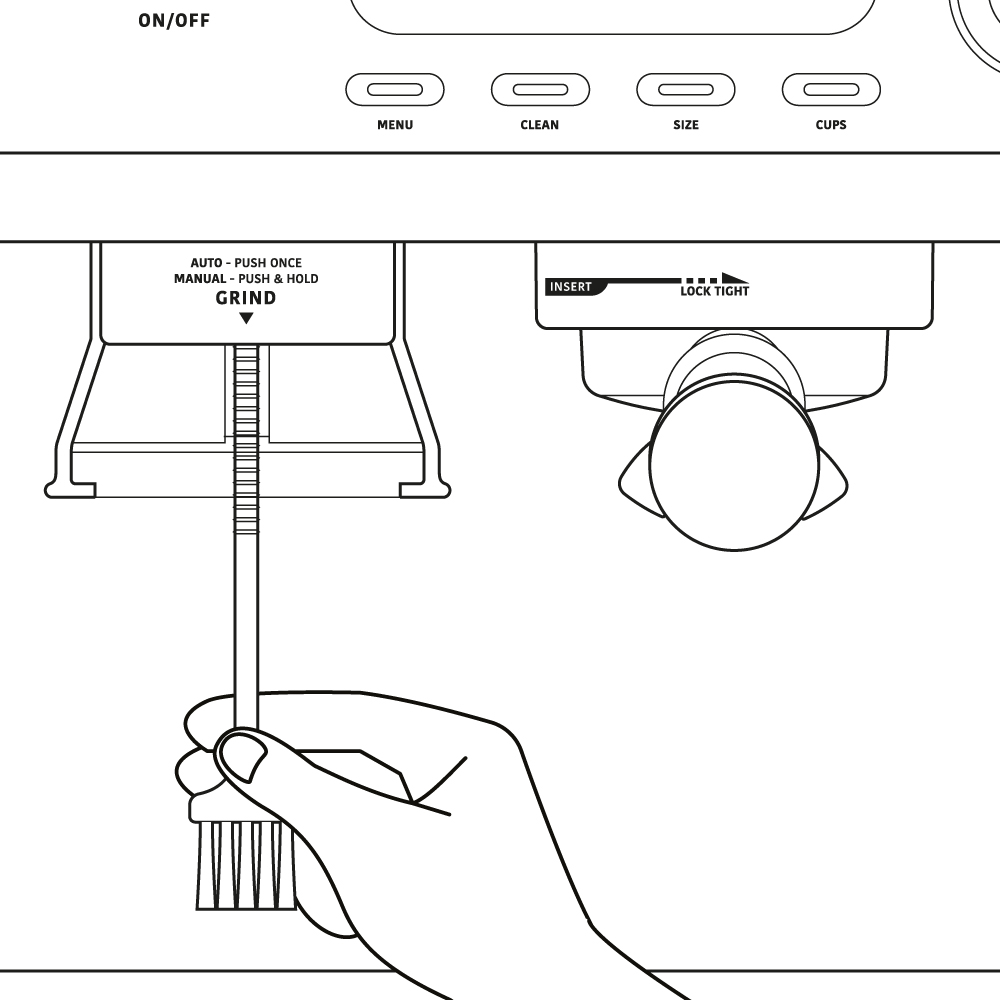
STEP 4
Declog and remove any stuck debris in the grinder chute using the other end of your grinder brush.

The first indications that descaling is required is when there’s a large amount of steam being produced and slower brewing of the espresso.
Limescale deposits have an adverse effect not only on the quality of the espresso and the water, but they also cause power losses and shorten the lifespan of the machine. The thicker a limescale layer is, the more difficult it is to remove.
We therefore recommend regularly removing limescale deposits with a descaling agent in accordance with the water quality in your area and how often the machine is used (approx. every 2 – 6 weeks).
Disconnect the machine from the mains power when it's not going to be used for a prolonged period. Clean the machine again if necessary and let it dry completely.
Store the machine and all accessories in a dry, clean, frost-free place that is protected from direct sunlight and cannot be accessed by children or animals. Use the machine cover to prevent dust build-up.
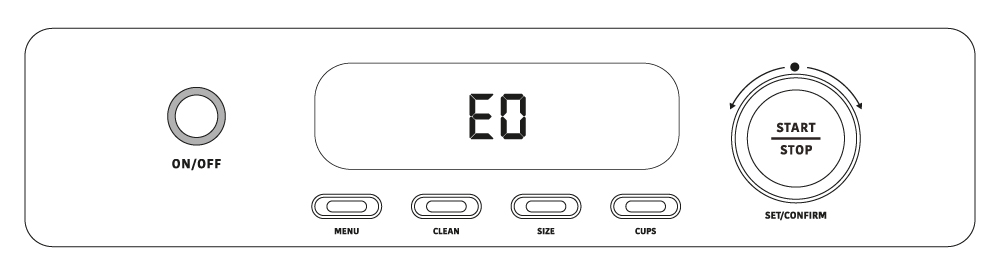
E0: Thermistor short circuit
E1: On/Off button defect
E2: Meu button defect
E3: Clean button defect
E4: Size button defect
E5: Cups button defect
E6: Start/Stop button defect
E7: Pre-heat fuction defect
E0: Thermistor short circuit
E1: On/Off button defect
E2: Meu button defect
E3: Clean button defect
E4: Size button defect
E5: Cups button defect
E6: Start/Stop button defect
E7: Pre-heat fuction defect
